"I thought you said it couldn't possibly be an earth ship?"
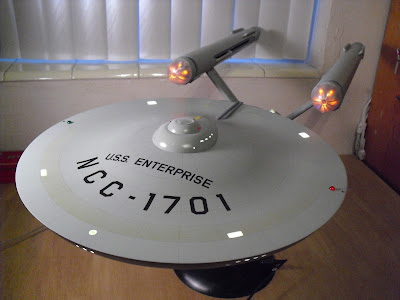
As a companion piece to the 350 scale Enterprise I scratchbuilt a 1:350th Botany Bay to go alongside it. (Based on plans drawn by Phil Broad and photos of the studio model)
The ship itself is made from Styrene overall with the exception of a wood dowel for the head which was then clad in styrene for the flat faces and puttied and sanded until firm and smooth. Some close enough kit parts were added on the rear end of the ship to represent the greeblies on the original. Some of the panel work that is shown as raised on the studio model will be represented as paint on this ship. I'd like to keep it as subtle as possible much like the gridlines on the saucer of the Enterprise.
A stand was made to match the Big E's, from a Plastruct acrylic hemisphere and Aluminum rod. overall build time has been about 12 hours on the little guy, not bad as a time killer when getting ready for work, or while watching some TV. A bit more putty work and priming and I'll be soldering some brass rod and screen together to make her rear heat sinks/antennas/strainers, then she'll be ready for paint!
You may notice the fronts and backs of the cargo pods are not backswept as on the studio model. This was a legitimately conscious decision. Growing up with the micro machines Botany Bay and having displayed it with my 1:1000th Enterprise for some time I got used to the flat pods and they seemed to make more sense in so far as fitting together as cargo modules so I kept them flat. For that matter I also kept the model slightly under scale, as the MM Botany Bay was to my old Enterprise, I think it makes the Big E a 'little' more impressive!
A little Bonus! If you ever wondered how large the Botany Bay, the Enterprise and the Bridge island of the CVN-65 Enterprise would be next to each other... NOW YOU KNOW!
CVN-65 piggybacking the Enterprise.


